It has been a long time since I posted here. It has a lot of reasons why is that like having my parents for a whole month, new responsibilities at work, the whole corona virus driving all of us nuts, but that shouldn’t be this way, so I’ll come back and post at least once a month again.
To start off, I’m going to show how to create service connections in Azure DevOps to give your CI/CD pipeline to be able to create/update resources in Azure.
So, I have a CI/CD pipeline in Azure DevOps that need permission to be able to create/update resources in Azure. To do so, you can create a thing in Azure DevOps called Service Connection.
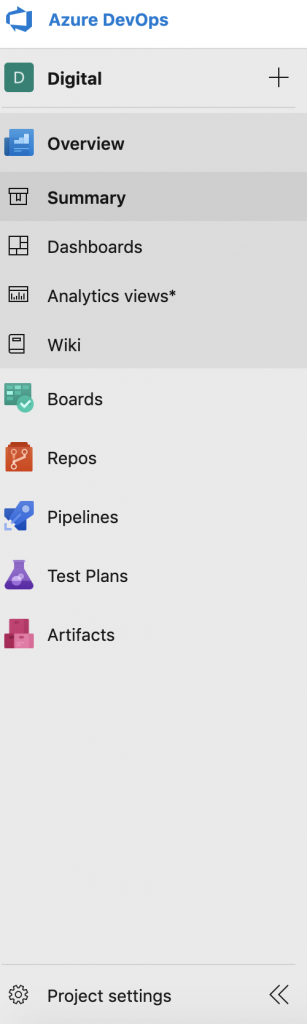
To create one, when you are in your Azure DevOps project, click on the “Project settings” as the picture below shows.
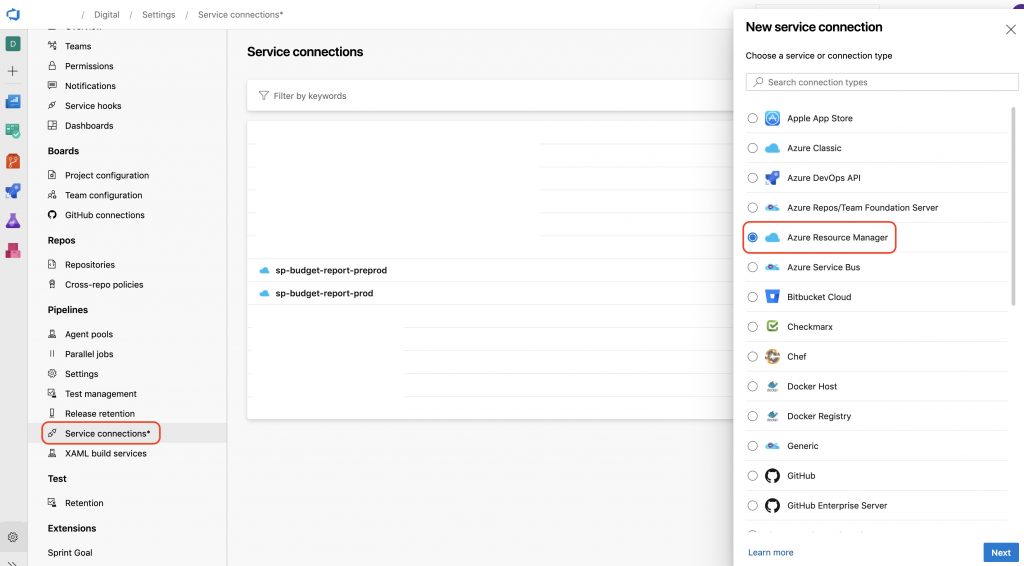
Once in the settings page, click on service connections, new service connection and select the option Azure Resource Manager as the picture show.
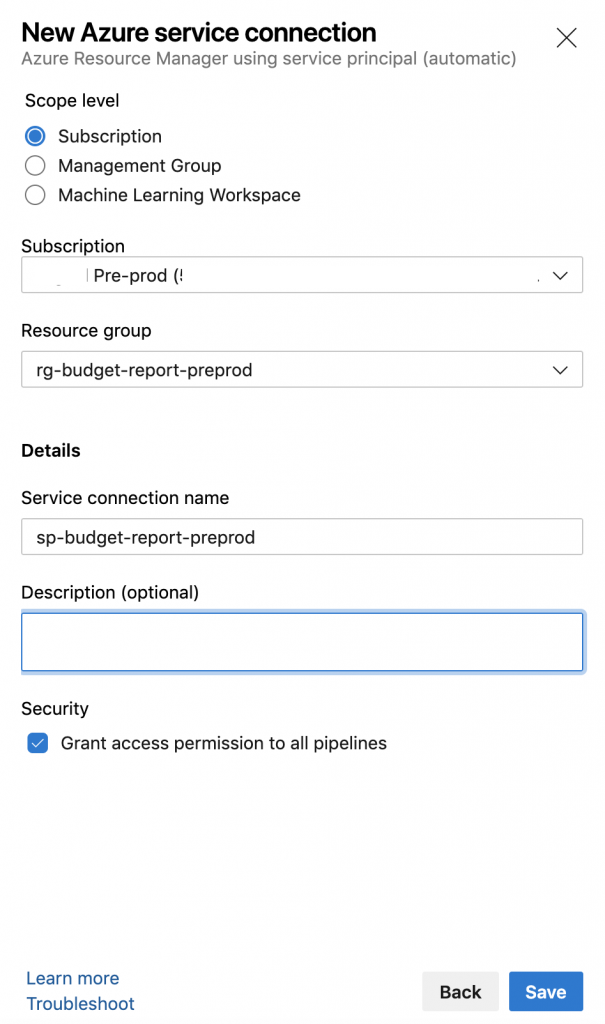
In the page that will open up, you can select any of the three options based on your requirements. I want to set the permission on a resource group level, to do so I’m choosing Service principal (automatic). This way I won’t have to copy and paste all the id’s from subscriptions and a few other things.
The scope level that I’m choosing is Subscription, so I need to specify the subscription as well as the resource group. Give it a name and click in Save.
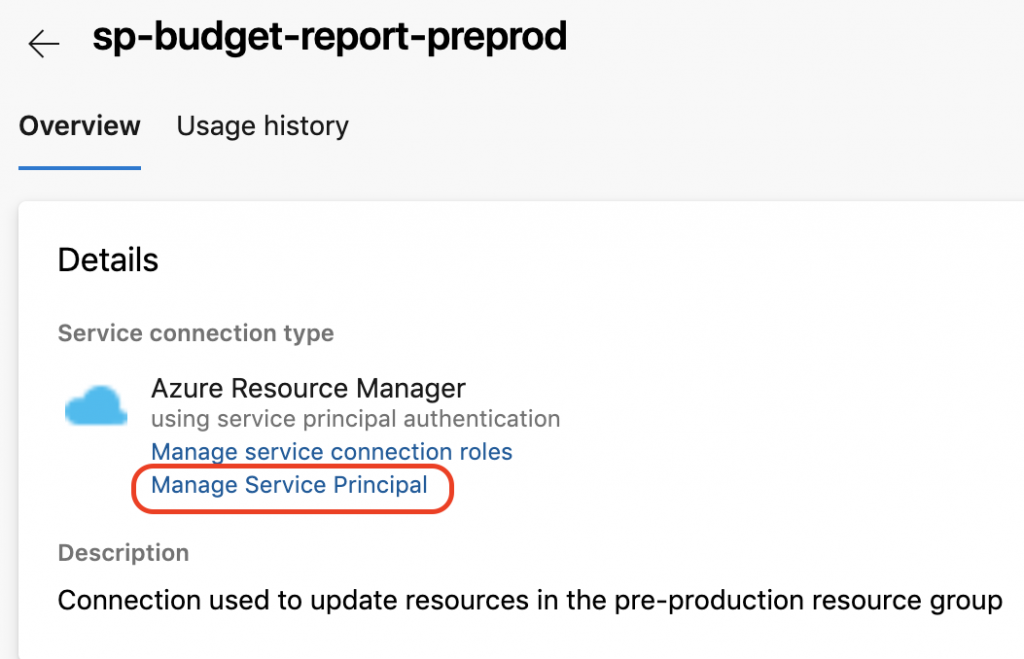
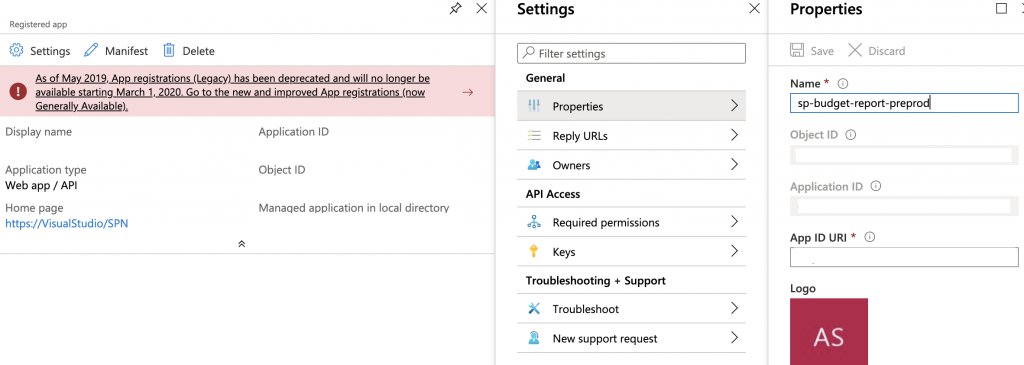
When this steps is completed, an application registration will be done in the Azure subscription you selected. The problem is relating the name that was used in the creation with that you specified in the last step.
To make it easy to find it, you can just go to the details page of the service connection you just created and click on the link “Manage Service Principal”. This will open the Azure portal exactly on that resource, that does not have the same name you specified in Azure DevOps.
When this service principal is opened in Azure you can click in Properties, Properties again and then you can change the name in the blade that shows up. In the company that I work for, we use the same name we used in Azure DevOps to avoid confusion.
Now, you can go to your resource group and set the permissions you need for this service connection / service principal using the RBACs controls.
This helps a lot setting up the permissions we need for our CI/CD pipelines.
I hope you guys like this post, and as I mentioned in the beginning of this post, I will be posting at least once a month, so stay tuned.